Ground Fog with Parallax
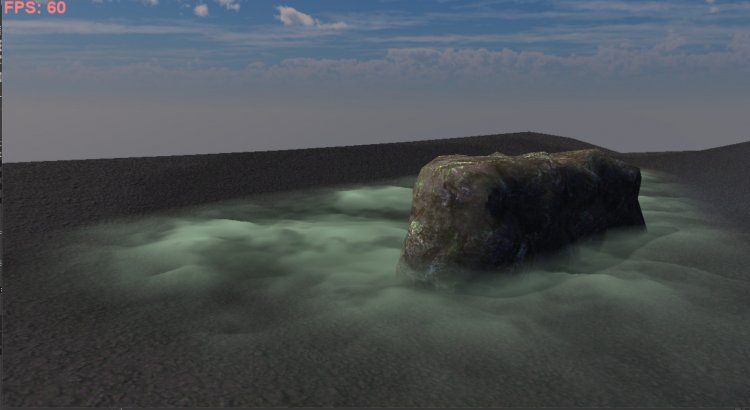
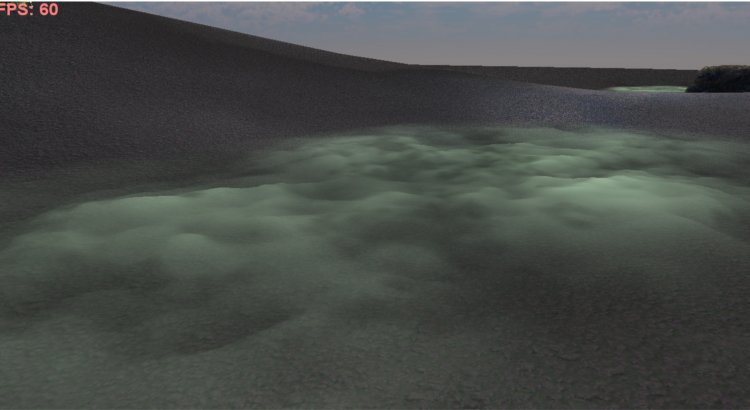
Since I started doing shaders I've begun to stare a lot at things. I stare at the ground. I stare at walls. I stare at rocks...and when autumn hit I started staring at fog...puddles....mud... This week I've been working on puddles and fog in keeping with that spooky October/November vibe. I worked out a pretty good mud puddle shader which I'll post next but I figured this one is done and I've tweaked the **** out of it so I need to stop at some point and know when it's done. This shader is made up of the fog shader (39_ground fog) and the POM shader (27_parallax occlusion) with a texture scroll element (02_texture scroll and/or 20_creek), which is nice because if you have these you can study each aspect of the shader independently if you so desire.
Since this is made from a few previous shaders, and because I feel I missed some points before, and because I'm only posting this one and I've heard a blog works well when it's somewhere between 200-500 words, AND because the shader code feels a little cluttered to me I figured I'd go a little in depth. You may be able to tell I don't entirely know what I'm doing but that seems to be all one needs for noob shading. I put this shader on a Leadwerks box brush and flattened the box to a plane. The blend mode is set to alpha, it's z-sorted and I unchecked "cast shadows" in the material editor.
I want to make a couple points so you can see some of the thinking behind this shader and adapt it to suit you, so I guess I'll just break this up in sections:
I have some grasp on this first section (in the vertex stage) and I can't remember how I wound up with it but it's just a variation on the TBN matrix in the Leadwerks parallax shader. The one point I want to make about this section is this line:
TBN_Matrix[2][2] -= 0.25; //lateral reduction
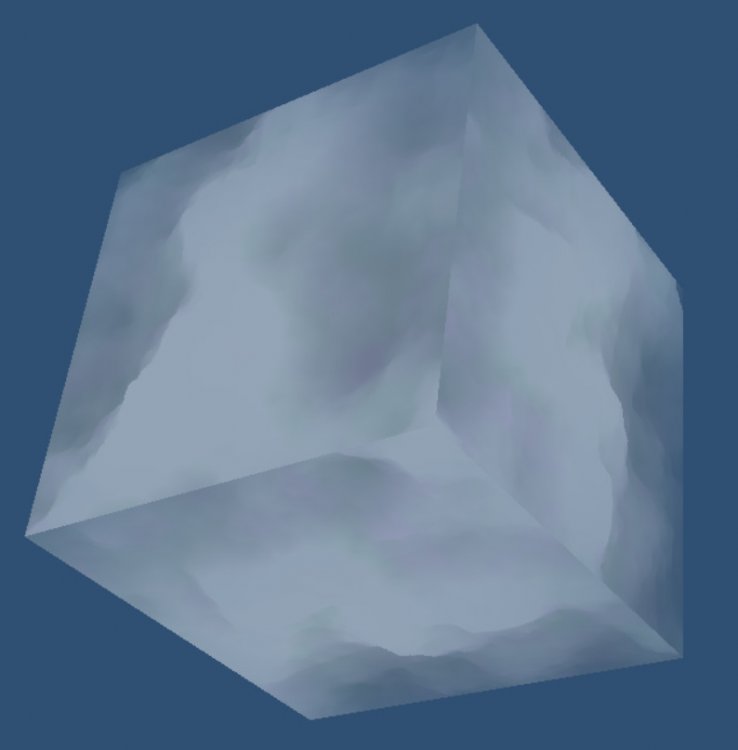
Somehow in my experimenting I figured out if you subtract some number from TBN_Matrix[2][2] you reduce the parallax effect at grazing angles. If you crank this up to "1.0" while looking at the box in the material editor you can see that along the sides there is no parallax at all. And this grazing angle is where the trouble comes from in dealing with curved surfaces. That makes this useful if you want to put POM on rolling hills or a curved wall, etc.
//Parallax tangent/binormal/normal matrix
mat3 TBN_Matrix;
TBN_Matrix[0] = ex_tangent*mat3(cameramatrix);
TBN_Matrix[1] = ex_binormal*mat3(cameramatrix);
TBN_Matrix[2] = ex_normal*mat3(cameramatrix);
TBN_Matrix[2][2] -= 0.25; //lateral reduction
vec3 inversecampos = vec3(camerainversematrix * ex_vertexposition);
eyevec = vec3(inversecampos) * TBN_Matrix;
The camerainversepos (in the vertex stage) is pretty simple but I have no idea why this works. But the z coordinate establishes the foreground depth in the fog (from camera to fog plane) (*shrug*).
camerainversepos = camerainversematrix * ex_vertexposition;
Fragment stage:
This next section is the same as it is in the parallax POM shader. The texture coordinates are set up as a vec3. The "for" loop creates several "slices" of the texture which increases in alpha according to the heightmap (z-coord). The slices are "pushed" along according to the eye vector (established in the TBN_matrix) and this is what gives the impression of the overlapping "3D" effect. The bright areas in the height map are pushed more than the dark areas. If the height is greater than the parallaxed_texcoords then break. The second "for" loop smooths out the spaces between these slices and that allows you to get away with a ridiculously small number of parallax_steps (slices) and this is why the parallax shaders look so good without being detrimental to the FPS.
One thing I want to point out here are these "height" lines. I found that if I start with a vec4(1) and subtract the height, which inverts the texture, and then do a 1-the texture inside the smoothstep - reverting it, it flips something in the parallax. When I then increase the smaller parameter of the smoothstep, it greatly reduces the slippage you get with parallax. If you change "anti_slip" to 0 and then run the game you can see what I mean - particularly if you strafe while looking at the fog. It will slip like crazy. So that's why these lines look so ridiculous. But an anti_slip setting of "0.3" appears to be enough to eradicate the slippage. Further, you can see I wrote the texture out twice in each "for" loop. This is because I'm scrolling the texture in two opposing directions. By multiplying them you get only the intersections of the two, giving a rippling effect very similar to how the normals create motion in the creek shader (20_creek). The "0.8" in the second height line only offsets the size of that texture slightly so that the two textures never line up exactly, which - in game - looks like a momentary freezing of motion. I also clamped the parallax_depth to between 0.0 and 0.1. 0.1 seemed to be more than I needed but if you end up in a situation where you need more than that you can delete this line (line 57) without any problem.
//Parallax
//----------------------------------------------------------------------------
float height;
vec2 tex = ex_texcoords0 * fog_tex_size;
vec3 parallaxed_texcoords0 = vec3(tex, 1.0);
parallaxed_texcoords0.xy += (time * fog_speed);
vec3 dir = (-eyevec / eyevec.z)/parallax_steps;
parallax_depth = clamp(parallax_depth,0.0,0.1);
dir.xy *= parallax_depth;
for (int i = 0; i < parallax_steps; i++) {
parallaxed_texcoords0 += dir;
height = vec4(1).r - smoothstep(anti_slip,1,1-texture(texture0, parallaxed_texcoords0.xy + (time * fog_speed)).r);
height *= vec4(1).r - smoothstep(anti_slip,1,1-texture(texture0, 0.8 * parallaxed_texcoords0.xy - (time * fog_speed*0.5)).r);
if (parallaxed_texcoords0.z < height) break;
}
for (int i = 0; i < parallax_steps; i++) {
dir *= 0.5;
if (parallaxed_texcoords0.z < height)
parallaxed_texcoords0 -= dir;
else
parallaxed_texcoords0 += dir;
height = vec4(1).r - smoothstep(anti_slip,1,1-texture(texture0, parallaxed_texcoords0.xy + (time * fog_speed)).r);
height *= vec4(1).r - smoothstep(anti_slip,1,1-texture(texture0, 0.8 * parallaxed_texcoords0.xy - (time * fog_speed*0.5)).r);
}
//-----------------------------------------------------------------------------
I uncommented this next section because I wasn't sure I wanted it. But the idea here is to affect the opacity of the fog from a distance so that when you're far away it is faded, and when you're close it's normal. You can comment these lines in and then on line 97 multiply this dist by the fog_opacity (inside the parentheses) and see the effect by walking backwards while looking at the fog.
//Distance
//float fade_dist = 30.0;
//float max_fade = 0.8; //0 - 1
//float dist = 1-clamp(smoothstep(0,1,distance(cameraposition, ex_vertexposition.xyz) / fade_dist),0.0,max_fade);
This next section establishes the outcolor. The parallaxed_texcoords0 already has a texture size variable applied to it, and I needed to do that prior to the "for" loops. But this outcolor really just works to add a little extra detail to the look of the fog and so I added an extra texture size modifier so I could change the size of this texture and get a few more "spots" on the surface of the fog. I established the texture with a time element and a reverse timed texture and added them together. I then clamped down the dark areas of the texture so that the fog is mostly light colors (you don't want dark clouds, really. It's fog). Lastly, I put a fog_hue adjustment and a fog_brightness adjustment like I do almost every time (note the spooky green hue). If you go to the fragData0 line and delete the outcolor.xyz you can see what it looks like without this section and it's cool. But I added this because I wanted a little more. It's preferential.
//Diffuse
float col_tex_size = col_tex_size_modifier;
vec2 col_tex = parallaxed_texcoords0.xy * col_tex_size;
vec4 outcolor = texture(texture0,col_tex + (time * fog_speed * 0.2));
outcolor += texture(texture0,0.8 * col_tex - (time * fog_speed * 2.0));
outcolor.xyz = clamp(outcolor.xyz,0.7,1.0);
outcolor.xyz *= fog_hue * fog_brightness;
The fog part of this shader is Josh's code from the soft particle shader so I'm not entirely sure how this section works but the shader first grabs the gl_FragCoord.xy/buffersize. The gist of this is that the shader is grabbing the entire screen size? Sort of the idea of a depth buffer is that the shader gets the distance from the camera to the fog plane (foreground depth) and the distance from the camera to the ground behind the plane (background depth) then gets the difference between the foreground and the background. And the effect shows weak or strong depending on this difference. At the end there I added a fog fade - which allows you to adjust this difference. You can see if you place your fog plane in a kind of bowl shape that the alpha border around it fades a lot. If you change this number to a 2, for instance, this alpha border will become much smaller (you don't want that). Lastly I added fog opacity which is pretty self-explanatory. But here you can multiply that fog opacity by the dist from the distance section above if you want the fog to fade out from far away.
//Screen depth
vec2 fogcoords = gl_FragCoord.xy / buffersize;
if (isbackbuffer) fogcoords.y = 1.0 - fogcoords.y;
float fog_backgrounddepth = depthToPosition(texelFetch(texture11,ivec2(fogcoords*buffersize),0).r,camerarange);
float fog_foregrounddepth = camerainversepos.z;
float diff = min((fog_backgrounddepth-fog_foregrounddepth)*fog_fade,fog_opacity); //fog_opacity * dist);
Finally I set the fog color and alpha. Again I establish the texture and set some time and speed to the texture coordinates to scroll them and here I just mix them together by 0.5. I then clamp the minimum like before. And for the alpha channel I clamp the fog difference by the parallaxed fog color.r - making the fog difference (diff) the minimum color so that the fog will not only fade by the difference but also by the height. I then add the difference times the height to strengthen the effect (though this could be considered preferential as well).
//Fog
vec4 fog_col = texture(texture0,parallaxed_texcoords0.xy + (time * fog_speed));
vec4 fog_reverse = texture(texture0, 0.8 * parallaxed_texcoords0.xy - (time * fog_speed * 0.5));
fog_col = mix(fog_col,fog_reverse,0.5);
fog_col.xyz = clamp(fog_col.xyz,0.3,1.0);
fog_col.a = clamp(diff * fog_col.r,diff,1.0) + (diff*height);
Ok so that's about it. If you have questions or comments feel free to drop them below.
-
 10
10
-
 1
1


2 Comments
Recommended Comments