AI-powered Texture Generation in Ultra Engine
Not long ago, I wrote about my experiments with AI-generated textures for games. I think the general consensus at the time was that the technology was interesting but not very useful in its form at the time. Recently, I had reason to look into the OpenAI development SDK, because I wanted to see if it was possible to automatically convert our C++ documentation into documentation for Lua. While looking at that, I started poking around with the image generation API, which is now using DALL-E 2. Step by step, I was able to implement AI texture generation in the new editor and game engine, using only a Lua script file and an external DLL. This is available in version 1.0.2 right now:
Let's take a deep dive into how this works...
Extension Script
The extension is run by placing a file called "OpenAI.lua" in the "Scripts/Start/Extensions" folder. Everything in the Start folder gets run automatically when the editor starts up, in no particular order. At the top of the script we create a Lua table and load a DLL module that contains a few functions we need:
local extension = {}
extension.openai = require "openai"
Next we declare a function that is used to process events. We can skip its inner workings for now:
function extension.hook(event, extension)

end
We need a way for the user to activate our extension, so we will add a menu item to the "Scripting" submenu. The ListenEvent call will cause our hook function to get called whenever the user selects the menu item for this extension. Note that we are passing the extension table itself in the event listener's extra parameter. There is no need for us to use a global variable for the extension table, and it's better that we don't.
local menu = program.menu:FindChild("Scripting", false)
if menu ~= nil then
    local submenu = menu:FindChild("OpenAI", false)
    if submenu == nil then
        submenu = CreateMenu("", menu)-- divider
        submenu = CreateMenu("OpenAI", menu)
    end
    extension.menuitem = CreateMenu("Text to Image", submenu)
end

ListenEvent(EVENT_WIDGETACTION, extension.menuitem, extension.hook, extension)
This gives us a menu item we can use to bring up our extension's window.
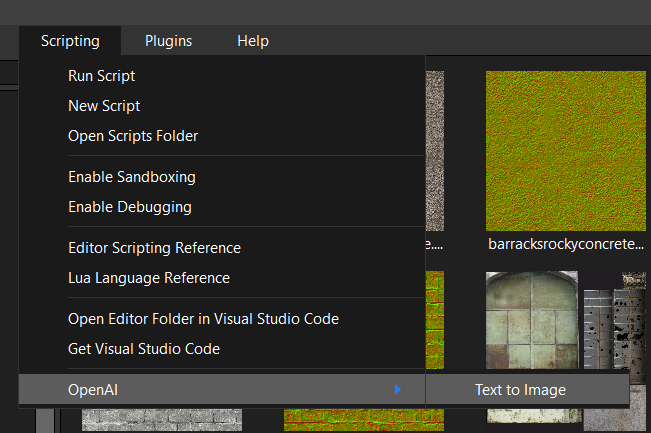
The next section creates a window, creates a user interface, and adds some widgets to it. I won't paste the whole thing here, but you can look at the script to see the rest:
extension.window = CreateWindow("Text to Image", 0, 0, winx, winy, program.window, WINDOW_HIDDEN | WINDOW_CENTER | WINDOW_TITLEBAR)
Note the window is using the WINDOW_HIDDEN style flag so it is not visible when the program starts. We're also going to add event listeners to detect when the window is closed, and when a button is pressed:
ListenEvent(EVENT_WINDOWCLOSE, extension.window, extension.hook, extension)
ListenEvent(EVENT_WIDGETACTION, extension.button, extension.hook, extension)
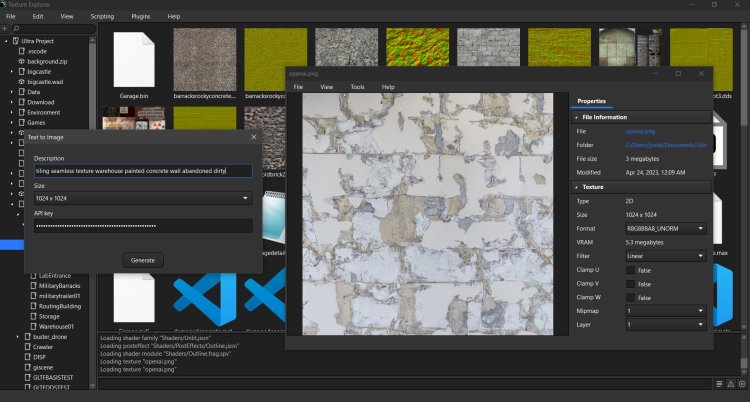
The resulting tool window will look something like this:
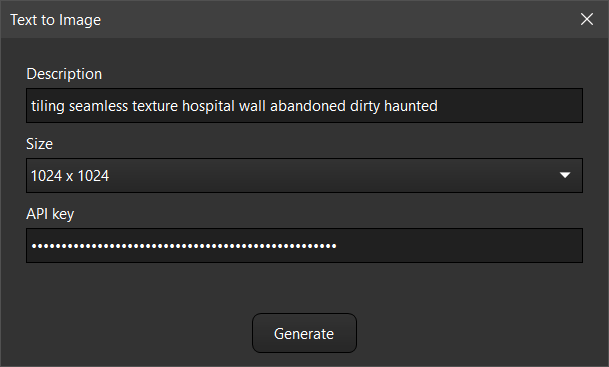
Now let's take a look at that hook function. We made three calls to ListenEvent, so that means we have three things the function needs to evaluate. Selecting the menu item for this extension will cause our hidden window to become visible and be activated:
    elseif event.id == EVENT_WIDGETACTION then

        if event.source == extension.menuitem then

            extension.window:SetHidden(false)
            extension.window:Activate()
When the user closes the close button on the tool window, the window gets hidden and the main program window is activated:
    if event.id == EVENT_WINDOWCLOSE then
        if event.source == extension.window then
            extension.window:SetHidden(true)
            program.window:Activate()
        end
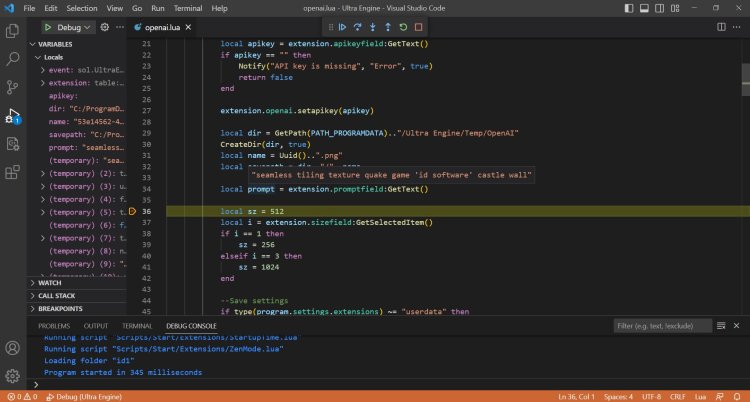
Finally, we get to the real point of this extension, and write the code that should be executed when the Generate button is pressed. First we get the API key from the text field, passing it to the Lua module DLL by calling openal.setapikey.
        elseif event.source == extension.button then

            local apikey = extension.apikeyfield:GetText()
            if apikey == "" then
                Notify("API key is missing", "Error", true)
                return false
            end

            extension.openai.setapikey(apikey)
Next we get the user's description of the image they want, and figure out what size it should be generated at. Smaller images generate faster and cost a little bit less, if you are using a paid OpenAL plan, so they can be good for testing ideas. The maximum size for images is currently 1021x1024.
            local prompt = extension.promptfield:GetText()

            local sz = 512
            local i = extension.sizefield:GetSelectedItem()
            if i == 1 then
                sz = 256
            elseif i == 3 then
                sz = 1024
            end
The next step is to copy the user's settings into the program settings so they will get saved when the program closes. Since the main program is using a C++ table for the settings, both Lua and the main program can easily share the same information:
            --Save settings
            if type(program.settings.extensions) ~= "userdata" then
                program.settings.extensions = {}
            end
            if type(program.settings.extensions.openai) ~= "userdata" then
                program.settings.extensions.openai = {}
            end
            program.settings.extensions.openai.apikey = apikey
            program.settings.extensions.openai.prompt = prompt
            program.settings.extensions.openai.size = {}
            program.settings.extensions.openai.size[1] = sz
            program.settings.extensions.openai.size[2] = sz
Extensions should save their settings in a sub-table in the "extensions" table, so keep data separate from the main program and other extensions. When these settings are saved in the settings.json file, they will look like this. Although generated images must be square, I opted to save both width and height in the settings, for possible future compatibility.
	"extensions":
	{
		"openai":
		{
			"apikey": "xxxxxxxxxxxxxxxxxxxxxxxxxxxxxxxxxxxxxxxxxxxxxxxxxxxxxxxx",
			"prompt": "tiling seamless texture warehouse painted concrete wall abandoned dirty",
			"size":
			[
				1024,
				1024
			]
		}
	},
Finally, we call the module function to generate the image, which may take a couple of minutes. If its successful we load the resulting image as a pixmap, create a texture from it, and then open that texture in a new asset editor window. This is done to eliminate the asset path, so the asset editor doesn't know where the file was loaded from. We also make a call to AssetEditor:Modify, which will cause the window to display a prompt if it is closed without saving. This prevents the user's project folder from filling up with a lot of garbage images they don't want to keep.
            if extension.openai.newimage(sz, sz, prompt, savepath) then
                local pixmap = LoadPixmap(savepath)
                if pixmap ~= nil then
                    local tex = CreateTexture(TEXTURE_2D, pixmap.size.x, pixmap.size.y, pixmap.format, {pixmap})
                    tex.name = "New texture"
                    local asseteditor = program:OpenAsset(tex)
                    if asseteditor ~= nil then
                        asseteditor:Modify()
                    else
                        Print("Error: Failed to open texture in asset editor.");
                    end
                end
            else
                Print("Error: Image generation failed.")
            end
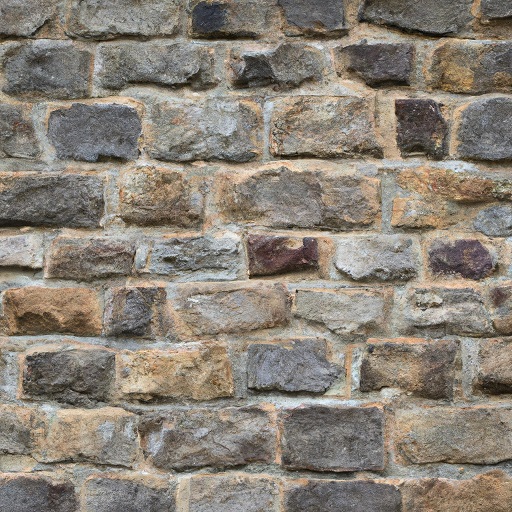
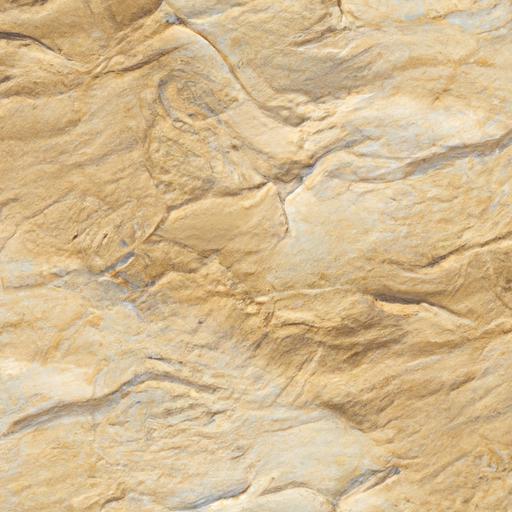
The resulting extension provides an interface we can use to generate a variety of interesting textures. I think you will agree, these are quite a lot better than what we had just a few months ago.
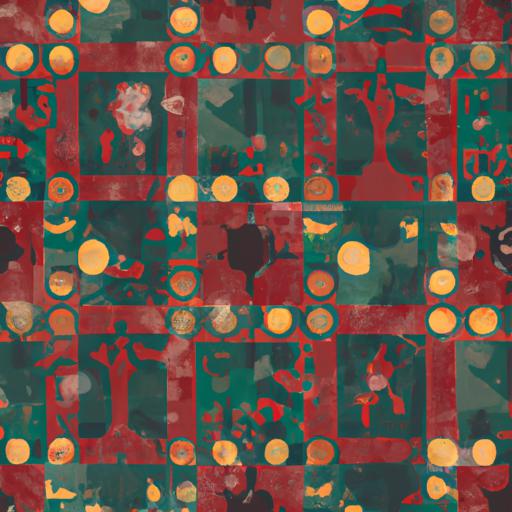
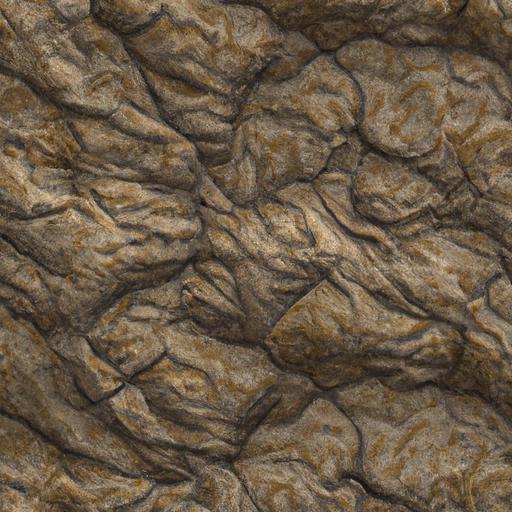
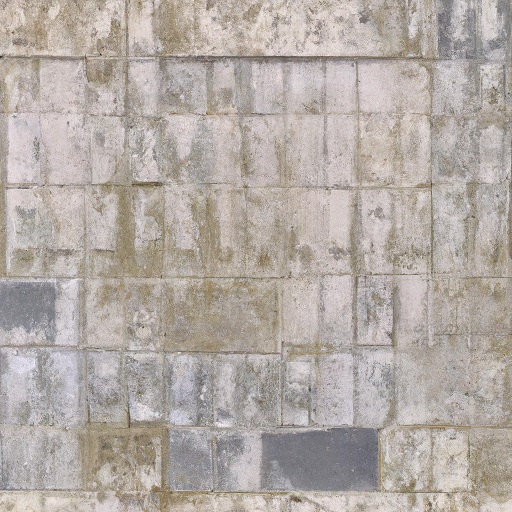
Of course the Lua debugger in Visual Studio Code came in very handy while developing this.
That's pretty much all there is to the Lua side of things. Now let's take a closer look at the module code.
The Module
Lua modules provide a mechanism whereby Lua can execute C++ code packed into a dynamic linked library. The DLL needs to contain one retired function, which is luaopen_ plus the name of the module, without any extension. The module file is "openai.dll" so we will declare a function called luaopen_openai:
extern "C"
{
    __declspec(dllexport) int luaopen_openai(lua_State* L)
    {
        lua_newtable(L);
        int sz = lua_gettop(L);
        lua_pushcfunction(L, openai_newimage);   lua_setfield(L, -2, "newimage");
        lua_pushcfunction(L, openai_setapikey);   lua_setfield(L, -2, "setapikey");
        lua_pushcfunction(L, openai_getlog);   lua_setfield(L, -2, "getlog");
        lua_settop(L, sz);
        return 1;
    }
}
This function creates a new table and adds some function pointers to it, and returns the table. (This is the table we will store in extension.openai). The functions are setapikey(), getlog() and newimage().
The first function is very simple, and just provides a way for the script to send the user's API key to the module:
int openai_setapikey(lua_State* L)
{
    APIKEY.clear();
    if (lua_isstring(L, -1)) APIKEY = lua_tostring(L, -1);
    return 0;
}
The getlog function just returns any printed text, for extra debugging:
int openai_getlog(lua_State* L)
{
    lua_pushstring(L, logtext.c_str());
    logtext.clear();
    return 1;
}
The newimage function is where the action is at, but there's actually two overloads of it. The first one is the "real" function, and the second one is a wrapper that extracts the right function arguments from Lua, and then calls the real function. I'd say the hardest part of all this is interfacing with the Lua stack, but if you just go carefully you can follow the right pattern.
bool openai_newimage(const int width, const int height, const std::string& prompt, const std::string& path)
int openai_newimage(lua_State* L)
This is done so the module can be easily compiled and tested as an executable.
The real newimage function is where all the action is. It sets up a curl instance and communicates with a web server. There's quite a lot of error checking in the response, so don't let that confused you. If the call is successful, then a second curl object is created in order to download the resulting image. This must be done before the curl connection is closed, as the server will not allow access after that happens:
bool openai_newimage(const int width, const int height, const std::string& prompt, const std::string& path)
{
    bool success = false;
    if (width != height or (width != 256 and width != 512 and width != 1024))
    {
        Print("Error: Image dimensions must be 256x256, 512x512, or 1024x1024.");
        return false;
    }

    std::string imageurl;

    if (APIKEY.empty()) return 0;

    std::string url = "https://api.openai.com/v1/images/generations";
    std::string readBuffer;
    std::string bearerTokenHeader = "Authorization: Bearer " + APIKEY;
    std::string contentType = "Content-Type: application/json";

    auto curl = curl_easy_init();

    struct curl_slist* headers = NULL;
    headers = curl_slist_append(headers, bearerTokenHeader.c_str());
    headers = curl_slist_append(headers, contentType.c_str());

    nlohmann::json j3;
    j3["prompt"] = prompt;
    j3["n"] = 1;

    switch (width)
    {
    case 256:
        j3["size"] = "256x256";
        break;
    case 512:
        j3["size"] = "512x512";
        break;
    case 1024:
        j3["size"] = "1024x1024";
        break;
    }
    std::string postfields = j3.dump();

    curl_easy_setopt(curl, CURLOPT_HTTPHEADER, headers);
    curl_easy_setopt(curl, CURLOPT_URL, url.c_str());
    curl_easy_setopt(curl, CURLOPT_POSTFIELDS, postfields.c_str());
    curl_easy_setopt(curl, CURLOPT_WRITEFUNCTION, WriteCallback);
    curl_easy_setopt(curl, CURLOPT_WRITEDATA, &readBuffer);

    auto errcode = curl_easy_perform(curl);
    if (errcode == CURLE_OK)
    {
        //OutputDebugStringA(readBuffer.c_str());
        trim(readBuffer);
        if (readBuffer.size() > 1 and readBuffer[0] == '{' and readBuffer[readBuffer.size() - 1] == '}')
        {
            j3 = nlohmann::json::parse(readBuffer);
            if (j3.is_object())
            {
                if (j3["error"].is_object())
                {
                    if (j3["error"]["message"].is_string())
                    {
                        std::string msg = j3["error"]["message"];
                        msg = "Error: " + msg;
                        Print(msg.c_str());
                    }
                    else
                    {
                        Print("Error: Unknown error.");
                    }
                }
                else
                {
                    if (j3["data"].is_array() or j3["data"].size() == 0)
                    {
                        if (j3["data"][0]["url"].is_string())
                        {
                            std::string s = j3["data"][0]["url"];
                            imageurl = s; // I don't know why the extra string is needed here...

                            readBuffer.clear();

                            // Download the image file
                            auto curl2 = curl_easy_init();
                            curl_easy_setopt(curl2, CURLOPT_URL, imageurl.c_str());
                            curl_easy_setopt(curl2, CURLOPT_WRITEFUNCTION, WriteCallback);
                            curl_easy_setopt(curl2, CURLOPT_WRITEDATA, &readBuffer);

                            auto errcode = curl_easy_perform(curl2);
                            if (errcode == CURLE_OK)
                            {
                                FILE* file = fopen(path.c_str(), "wb");
                                if (file == NULL)
                                {
                                    Print("Error: Failed to write file.");
                                }
                                else
                                {
                                    auto w = fwrite(readBuffer.c_str(), 1, readBuffer.size(), file);
                                    if (w == readBuffer.size())
                                    {
                                        success = true;
                                    }
                                    else
                                    {
                                        Print("Error: Failed to write file data.");
                                    }
                                    fclose(file);
                                }
                            }
                            else
                            {
                                Print("Error: Failed to download image.");
                            }

                            curl_easy_cleanup(curl2);
                        }
                        else
                        {
                            Print("Error: Image URL missing.");
                        }
                    }
                    else
                    {
                        Print("Error: Data is not an array, or data is empty.");
                    }
                }
            }
            else
            {
                Print("Error: Response is not a valid JSON object.");
                Print(readBuffer);
            }
        }
        else
        {
            Print("Error: Response is not a valid JSON object.");
            Print(readBuffer);
        }
    }
    else
    {
        Print("Error: Request failed.");
    }

    curl_easy_cleanup(curl);

    return success;
}
My first attempt at this used a third-party C++ library for OpenAI, but I actually found it was easier to just make the low-level CURL calls myself.
Now here's the kicker: Any web API in the world will work with almost the exact same code. You now know how to build extensions that communicate with any website with a web interface, including SketchFab, CGTrader, itch.io, and easily interact with them in the Ultra Engine editor. The full source code for this and other Ultra Engine modules is available here:
https://github.com/UltraEngine/Lua
This integration of text-to-image tends to do well with base textures that have a uniform distribution of detail. Rock, concrete, ground, plaster, and other materials look great with the DALL-E 2 generator. It doesn't do as well with geometry details and complex structures, since the AI has no real understanding of the purpose of things. The point of this integration was not to make the end-all-be-all AI texture generation. The technology is changing rapidly and will undoubtedly continue to advance. Rather, the point of this exercise was to demonstrate a complex feature added in a Lua extension, without being built into the editor's code. By releasing the source for this I hope to help people start developing their own extensions to add new peripheral features they want to see in the editor and game engine.
-
 4
4



6 Comments
Recommended Comments