Further down the rabbit::hole
Let's start with some code for making instances and unique copies of a material:
Material* mat1 = new Material;
mat1->SetColor(0,0,1,1);

Material* mat2 = mat1->Copy(true);
Material* mat3 = mat1->Copy(false);

mat1->SetColor(1,0,0,1);
mat1 and 2 will be red. mat3 will be blue. Shaders, textures, and entities work the same way.
Drawing commands are in. I like how OpenGL3 gets rid of all the built-in matrix stuff and just lets you deal with pure matrix multiplication. It would probably be pretty difficult for a beginner to get into, but it's much cleaner, and it forced me to learn a little more about matrices. I added a mat4 orthogonal projection class function, if you're interested in that sort of thing.
I don't have DrawImage(), SetBlend(), SetColor(), etc. commands in, because the material system can handle all of that, and it's much more powerful. Here's some sample code:
Material* mat = LoadMaterial("myimage.mat");
mat->SetColor(1,0,1,0.5);
mat->SetBlend(BLEND_ALPHA);
mat->Enable()
DrawRect(2,2,10,20);
mat->Disable()
You can also draw polygons onscreen if you want. Vertex positions will correspond to screen coordinates:
Material* mat = LoadMaterial("myimage.mat");
Surface* surf = CreateSurface();
surf->AddVertex(0,0,0);
surf->AddVertex(0,1,0);
surf->AddVertex(0,1,1);
surf->AddTriangle(0,1,2);
mat->Enable()
surf->Draw()
mat->Disable()
There are two types of multisampling in OpenGL. The older technique uses the graphics window pixel format. The newer technique involves an FBO with a multisample format. I am going to disable the first technique, because normally rendering is performed on an FBO (a Leadwerks "buffer") and you don't want multisampling to mess up your 2D drawing that is typically done after 3D rendering. It also prevents the user from having to recreate a graphics window to toggle antialiasing on and off. So to sum that all up, antialiasing should be as simple as just defining a multisample format when you create a buffer, which can be 1,2,4,8, or 16.
I also hired an outside developer to research fluid simulations for ocean water. Here is an early prototype. There's still some improvement to make, but the technique is promising:
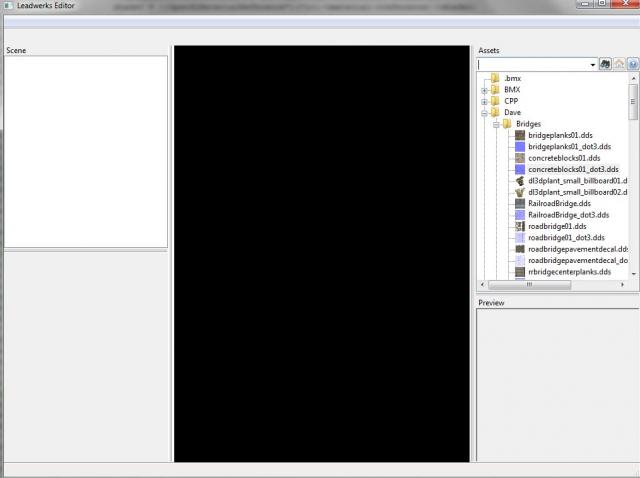
On to the editor. Here's the prototype. You can see the asset tree on the right, which functions pretty much like Windows Explorer:
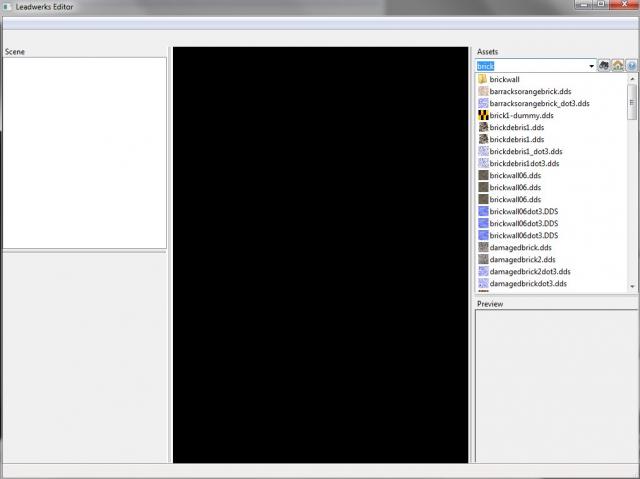
You can enter a word in the search box, press enter, and the results are instantly filtered. I was surprised at the speed, even with thousands of files:
You can right-click on a source art asset and convert it to a final game-ready file format. Here we have a png file you can convert to DDS:
And the familiar DDS convert dialog will appear:
If you choose the "Reconvert" option, the converter will be run with the last options used to convert that file, without pulling up the options dialog. These settings are stored in a file with the image file, and will be remembered across editor sessions.
One of the coolest features is that the editor automatically detects file changes and will ask you to reconvert a file. Or if you prefer, you can set the editor to always perform conversions automatically.
Overall, I myself am surprised at the speed with which Leadwerks Engine 3 is taking shape. It's still hard to say exactly when it will be ready, because little details can pop up and take more time, but it's going well.


28 Comments
Recommended Comments